So Its been a while and what have I been doing? Study. Long story short is that my current curriculum took some 60 to 70 hours of my time each week if not more, which left me mentally drained for whatever time I had left over. But all that is past me now and to appease my fellow blogger Jon Paul (OMG its a Blog post!) I have decided to share with you all the fruits of my latest project, The ultramarines 2nd company!
Over the course of the next few weeks I will unveil the progress I have made thus far, Take you through each of the tactical squads so far and the vehicles, if which Im going to start with my Storm Talon (or to be precise the base more so)
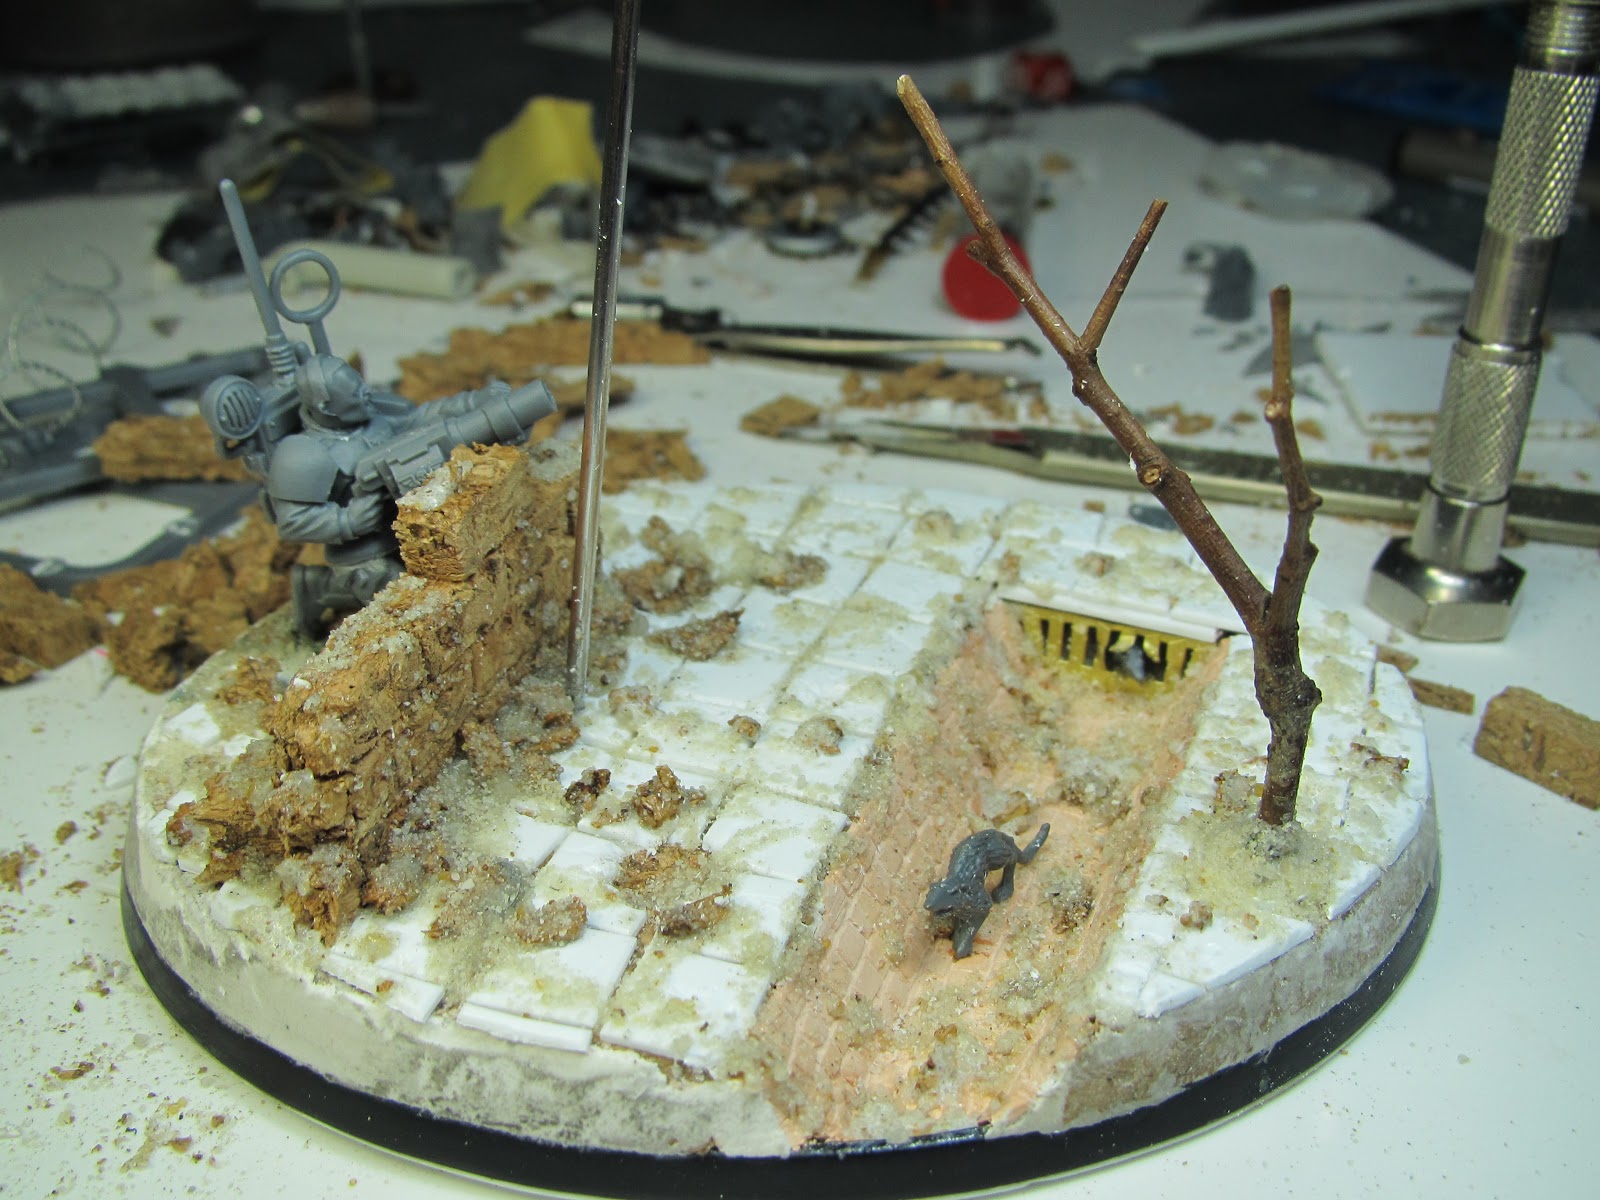
Before I showcase the remaining pictures of the base I will give those of you who no doubt will we to know how this base was made a quick run down. I have taken a standard GW flyer base, cut out the section for the drainage ditch and filled the rest with a spak filler putty. The bottom of the base is sealed with a 1.5mm thick piece of plasticard to ensure no detritus will ever fall out. From there the entire base was covered in a 6mm thick layer of cork board, of which section were cut out in to 'bricks' to make the wall for the guardsman.

 |
| Peek a Boo! The lid of that drain is removable for now so the interior can be painted. |
Lastly a pva glue mix of washed builders sand and cork cutoffs and dust was applied liberally across the base.
 |
| The guardsman's legs had to be cut apart and remodelled with Pro-Create to allow him to kneel at the wall. |
 |
| They all look so small from here, like rats! |
Last but not least is the mounting system, for which im afraid the pictures got lost, so you'll have to wait for it! Needless to say the mounting is magnetised, and the base can be picked up from the Storm Talon itself.
 | ||
| True to model I ensure my modifications have the exact same range of weapon arc as the original if I can. that Gun has a 2 step height system built in so it wont droop and can range 360 degree just like the original. |
oh and btw. Not!
Its about bloody time !
ReplyDelete